
Install Pi-Hole in Docker Container on Synology NAS

These instructions will get Pi-Hole up and running in a Docker container on a Synology NAS. My specific model is a DS725+ running DSM version 7.3.
Create Docker Folders
Create a folder in the Docker directory called ‘pihole’. In the /volume1/Containers/pihole directory, create two additional folders called ‘pihole’ and ‘dnsmasq’.
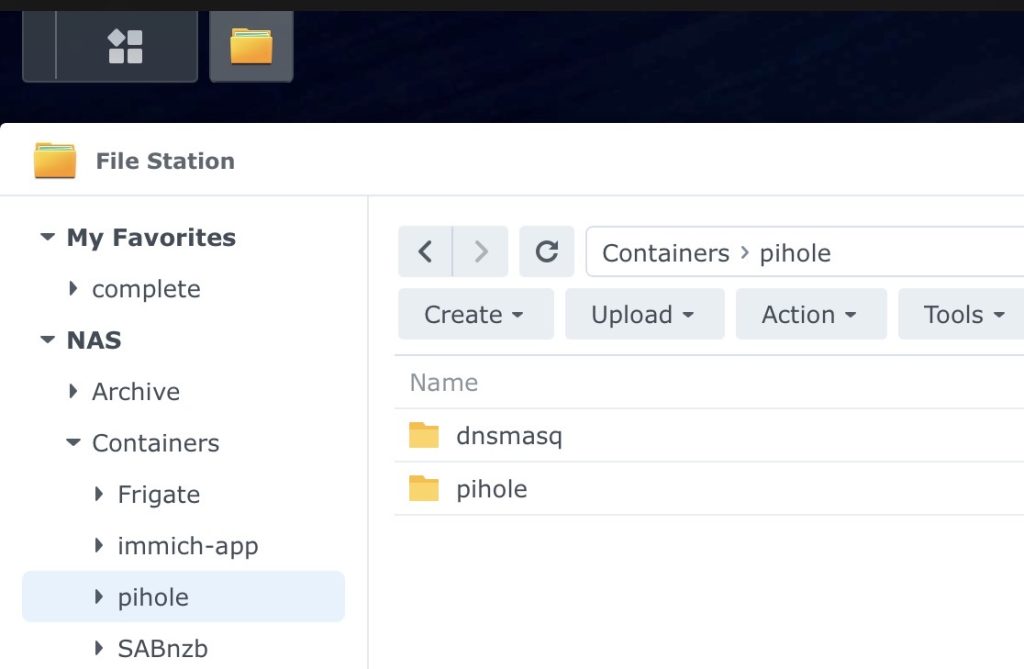
In DSM:
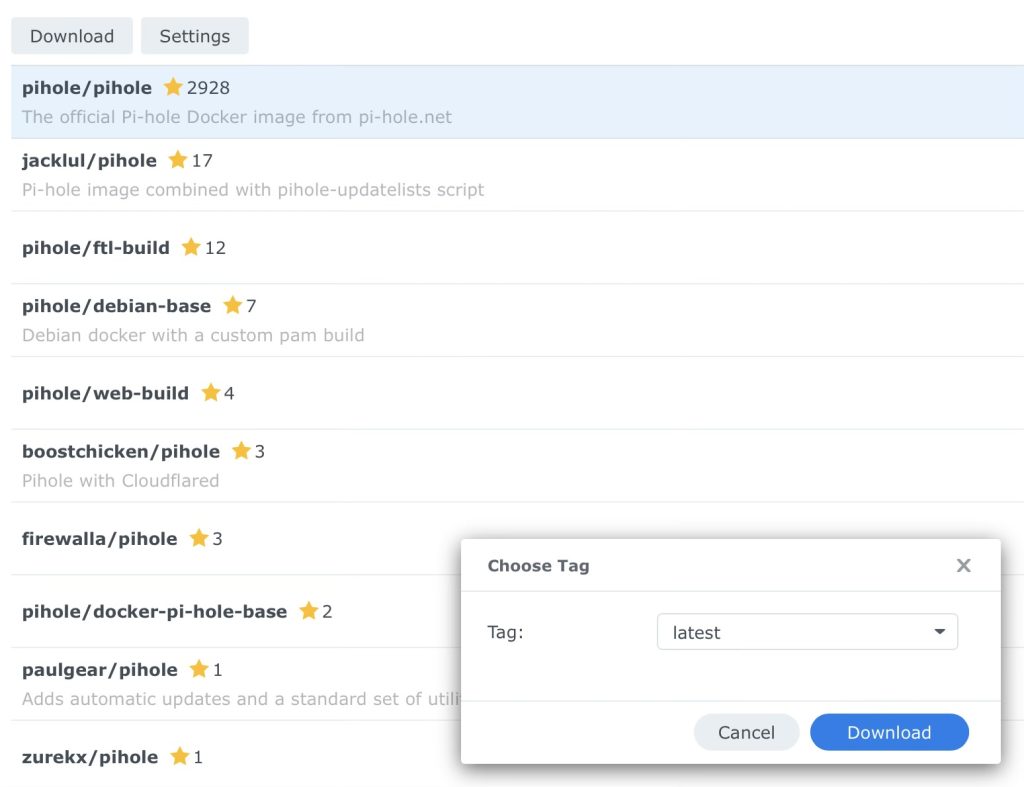
- Open Container Manager and click on Registry
- Search for ‘pihole/pihole‘ and download the latest
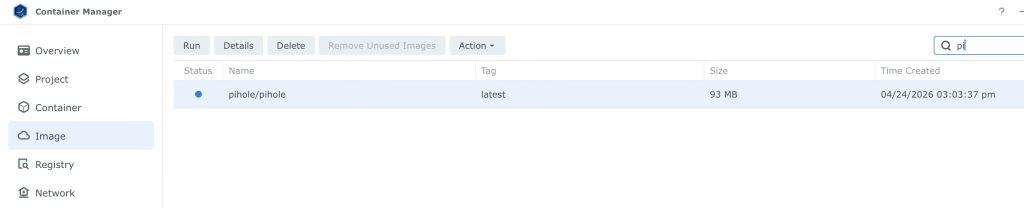
- In Container Manager, click ‘Image’ on the Left side
- Then click Run the image
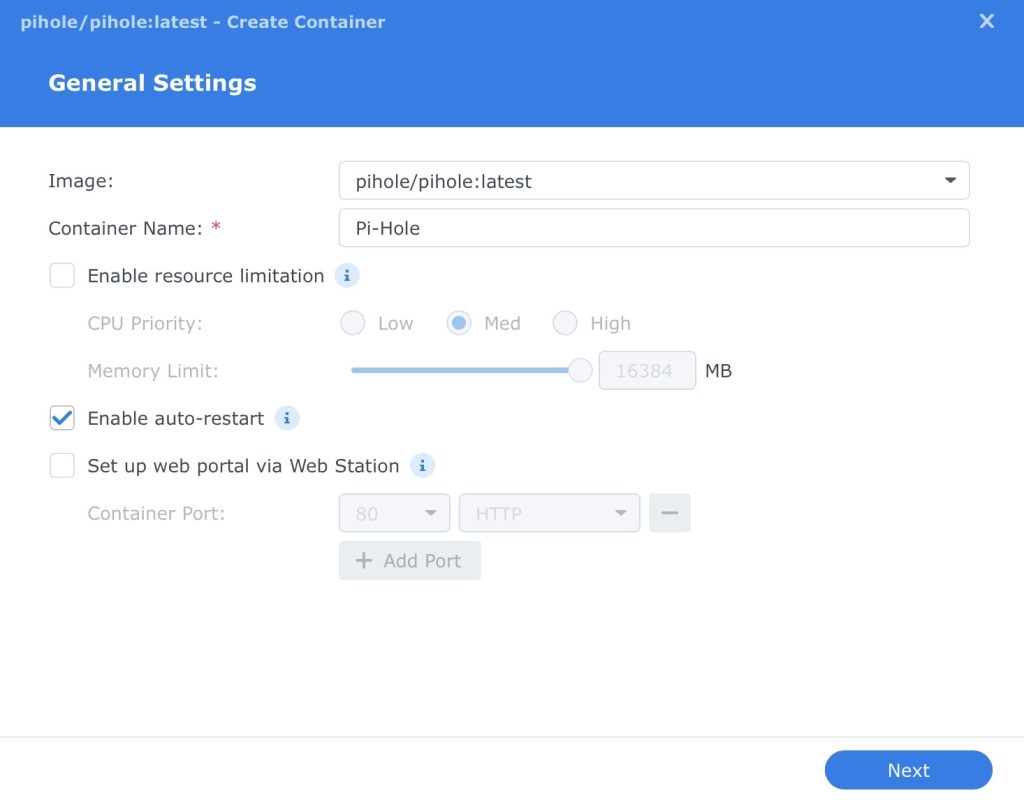
- Name the container ‘Pi-Hole‘
- Select auto-restart
- On the Volume Mappings screen, set the mappings as follows:
- Containers/pihole/dnsmasq.d > /etc/dnsmasq.d
- Containers/pihole/pihole > /etc/pihole
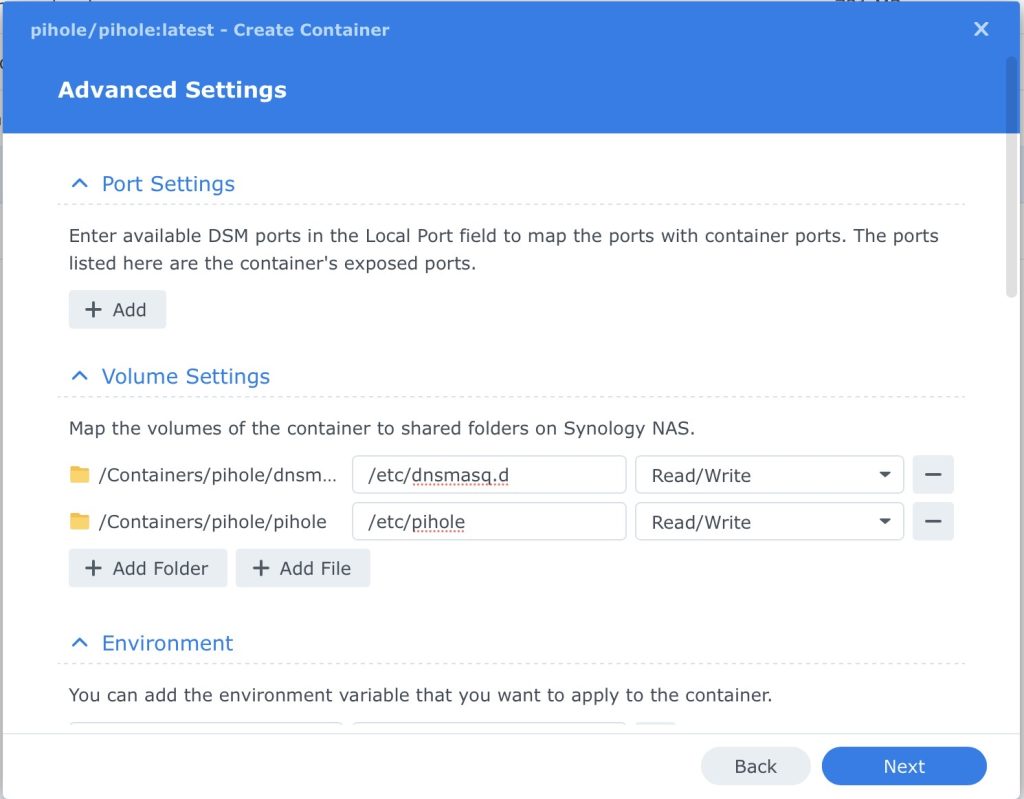
- Environment Variables to add:
- TZ = America/Los_Angeles
- FTLCONF_dns_listeningMode = all
- FTLCONF_webserver_api_password = *anything*
- FTLCONF_webserver_port = 8181
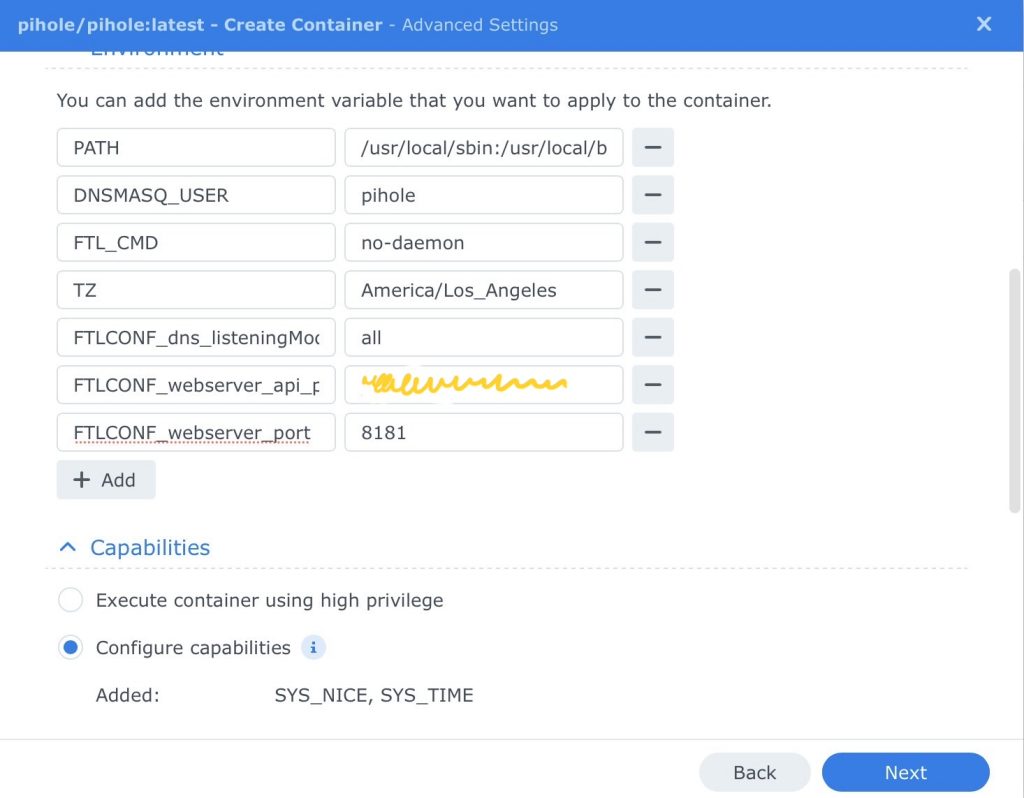
Capabilities:
SYS_TIME, SYS_NICE
Network: host
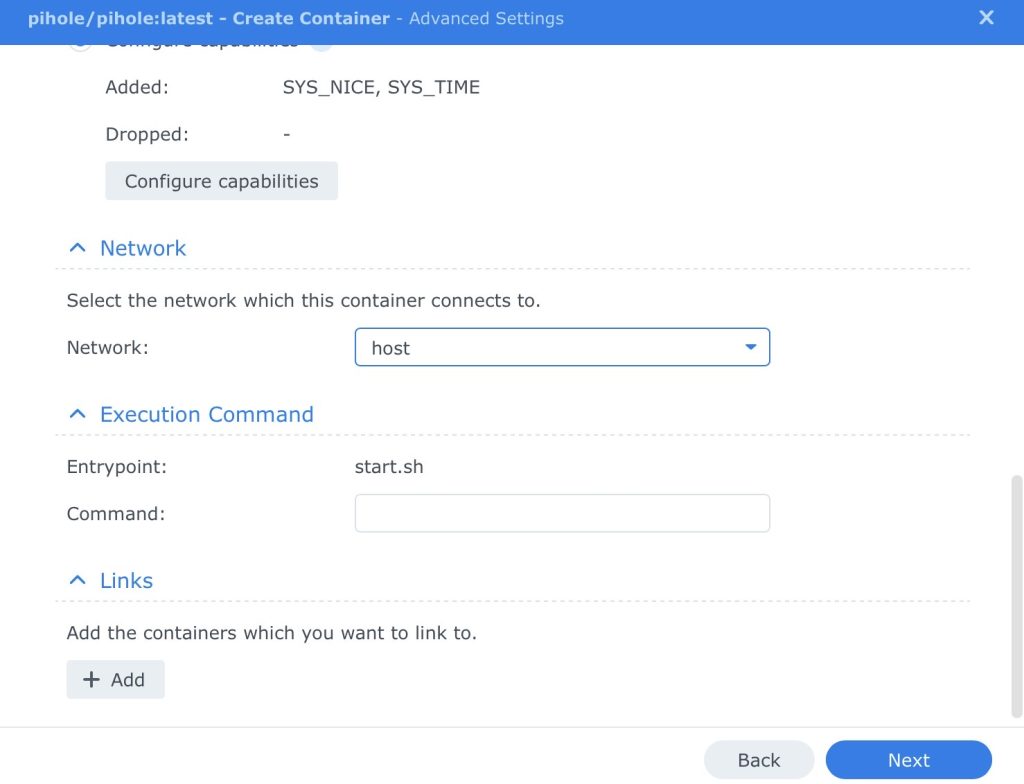
- Click Next.
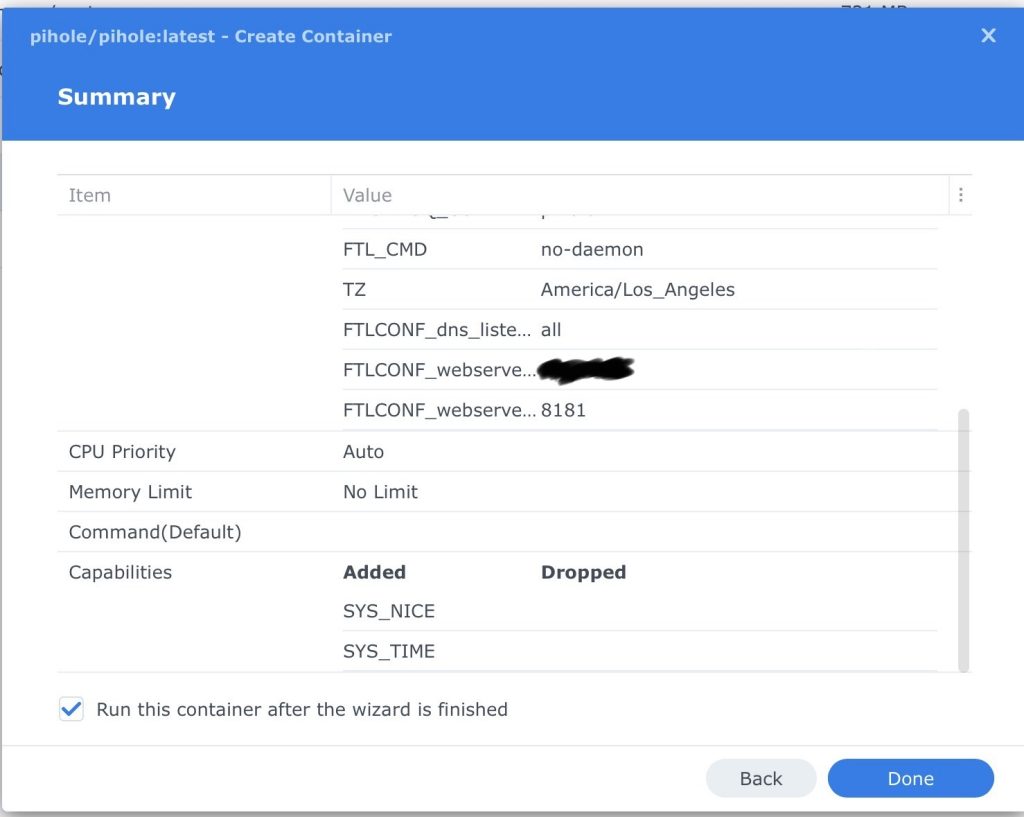
- The Summary screen should look like the following:
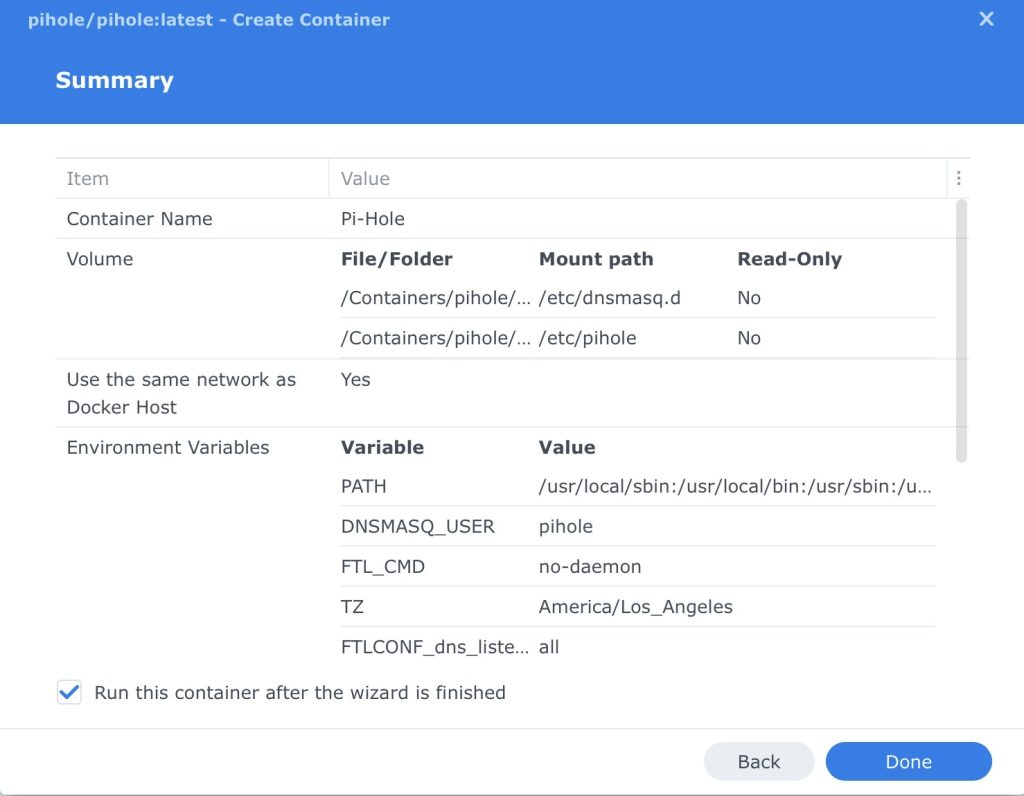
- Click Done to run the container.
- Connect to the web server @ http://192.168.1.51:8181 or whatever your IP is.
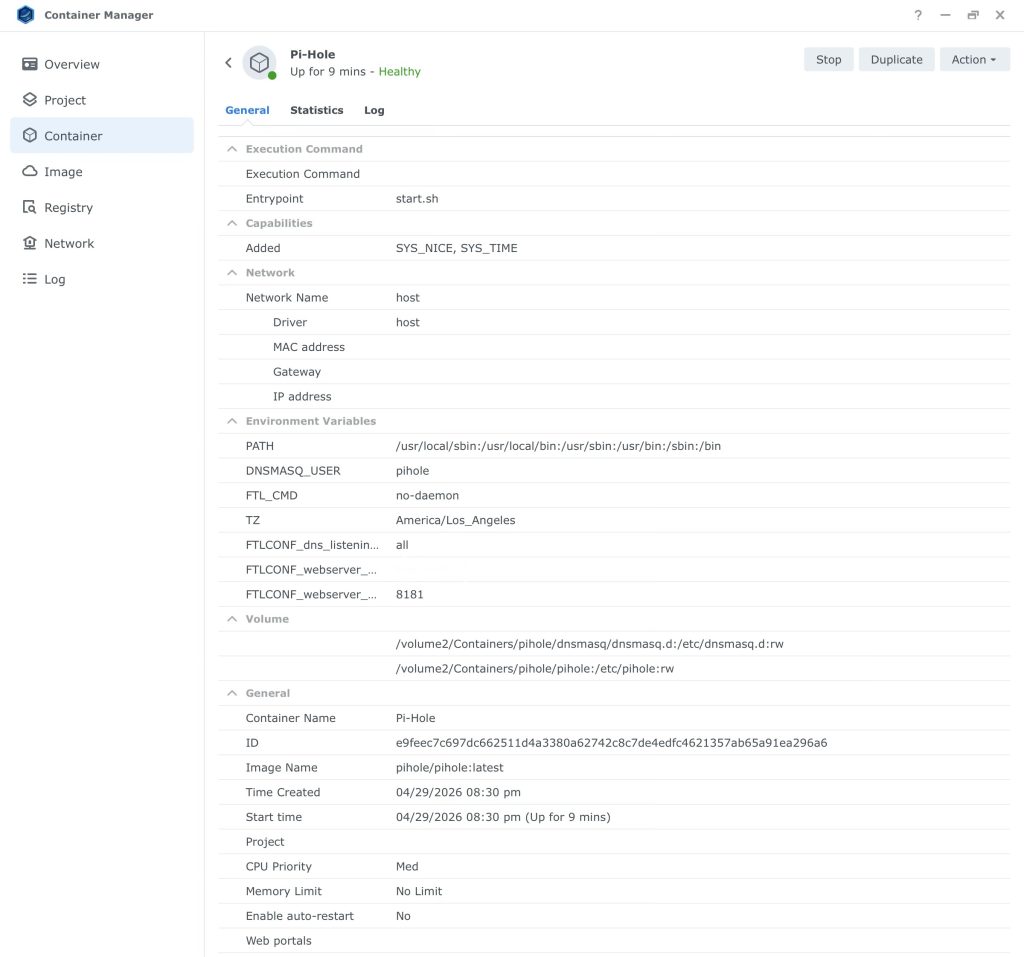
- The Pi-Hole docker container is sharing the Synology hosts IP address.
- If you have enabled the Synology firewall then there are probably some setting to change. I do not use it.
- You will also need to update your router DHCP settings to change the DNS server to the new Pi-hole IP address of your NAS. Once done, clients will need their DHCP lease to be released/renewed to pick up the new DNS IP of the Pi-Hole server.
Configuration
Not that Pi-Hole has been installed, the next step is to configure it. Click here to move on!